Maya Lesson One (Pre-Introduction)
This first lesson of Maya was all about the basics. I focused on Extruding, Bevelling, Colour and the Pivot tool. I found doing these tasks difficult to begin with but as the lesson continued; I noticed a few similarities between Maya and Photoshop. I will continue practicing with these shapes for the rest of this week, which would help in making me more confident in using this type of software.
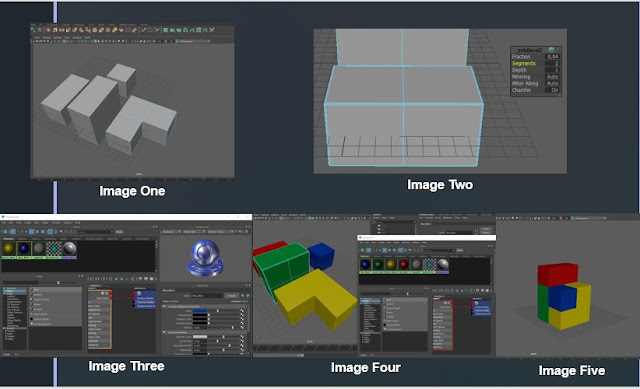
To get the ‘L’ shape you need to use the Extruding tool. This is done by selecting the face of a cube (from one of the rectangular shapes) and then selecting the Extruding tool. This will create a cube inside the current shape therefore, by using the move tool you are able to pull out the new section of your current shape. (Image one shows the shapes I created including the ‘L’ shaped one.)
As the main project I am focusing on is environments, it is really uncommon to find a building with sharp edges. Therefore, the Bevelling tool is used to slightly curve these edges. First you have to select the outer edges of the shape and then select the Bevel tool. Then after adjusting the fraction to 0.04 and the segments to 2, it made the edges rounder. However, for the ‘L’ shape all of the edges have to be selected as it will prevent Maya from using n-gons. (This is shown in image two.)
The Hypershade tool is used to create the material (colour), which can then be added to the shapes. By selecting ‘create blinn’ (under the Maya dropdown box) allows you to create a new colour, then it can then be re-named. Once a colour is created there is a couple of ways they can be transferred to the shapes. One way is simply dragging the blinn from the Hypershade window onto a shape by using the middle mouse button. Another way to assign the texture to an object; is select the object, right click onto it then select ‘assign existing material’. This then gives you the option to choose any of the colours that have been created. (creating the blinn colours is shown in image three and image four shows the new colours I assigned each of my shapes.)
Lastly is moving these objects around, an easy way to do this is changing the pivot point; for example, moving it from the centre of a shape to the edge. Use the move tool and on a selected shape, then hit the ‘D’ key and whilst holding down the ‘V’ key you are then able to move the pivot point around. (Image five shows how I have moved the shapes around.)


Comments
Post a Comment