Posts

Showing posts from October, 2019

Art Of

Art of Isaura by Saskia on Scribd

Invisible Cities Reflective Statement

This project allowed me to look into concept art and how it is beneficial to the pre-production stage of any project. By reading a selection of passages from Italo Calvino's 'Invisible Cities' it allowed be to focus more on the art side, than having to create a whole idea of an environment from scratch. Once we read the passages we had to create a minimum of 100 thumbnails, presenting the ideas of what we could create. This helped in the amount of time I spend drawing and I feel that I have improved within some aspects of my work. Alongside this, the influence maps helped in showing more in-depth ideas and where I could expand on my work for example, the colour pallets and structure ideas. I chose Isaura, a city that centres around water and the growth of plants. I decided on this city as there were multiple ideas I could use to create the digital paintings. Alongside this, I looked into perspective exercises. This helped in not only getting perspectives correct but also

Interior Establishing Final

Image

Exterior Low Angle Final

Image

Exterior Establishing Final

Image

Invisible Cities Project

Invisible Cities by Saskia on Scribd

Maya Rendering

Below is a link to the Lego Car I have created, then fully animated and rendered. Lego Car Animation

Animate Bouncing Characters

Image
Attempt One Attempt Two Attempt Three For this task I had to use the bouncing ball I created last week, to create three different bouncing characters. This shows the arch, squash and stretch, timing and spacing, along with follow through and overlapping. When looking back over each character, the improvements that I would need to make are making the ears bigger within the second one. Alongside, changing the movement of the legs in the duration of it hitting the surface within the third one.

Interior Developed Thumbnails

Image
Here I expanded more on what I believe the interiors of a couple of buildings would be, this also allowed me to experiment with what colours I'd use. For the interiors I wanted to focus on how the water is being brought up. One and two is a windmill structure as it is how the need of water is met, I like how I was able to present the functionality and the purpose of the building. Three and four is inside a temple which links to the worship side, I like the idea of the stained glass for the windows alongside the idea of the entrance way from Shintoism. For the final piece I believe I'd use either idea one or four, as I like how the view points are able to capture the majority of the details within each building. I will want to improve by adjusting the perspectives and adding more details, highlights, depth and tone.

Maya Car Animating

Image
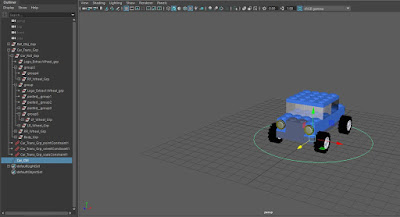
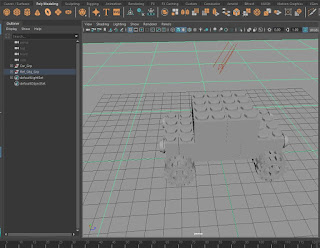
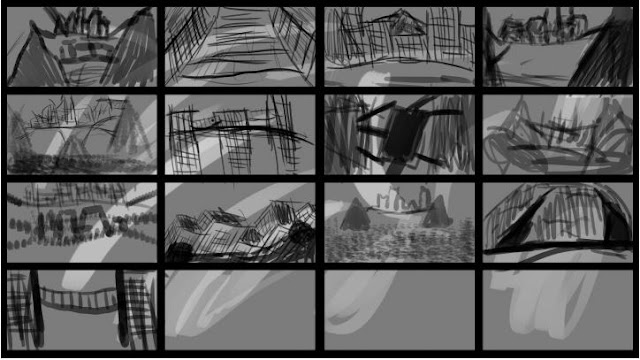
When animating movement of the car, the timeline had to be taken into consideration. For this the frame rate was set to 24 and the amount of frames that were used was 35. On the first frame the translate Z was changed to -45 as this was the starting point. On frame 30 the translate Z was set at 0.5 which is the end point. The graph editor changed how the car accelerates, stays at constant speed or decelerates. Alongside this, by changing the translate Z to -5 on frame 16, makes the car start faster and then rapidly changes speed to slow down. The Graph Editor To make the car turn requires changes to the skid attribute, at frame 1 and 16 the skid was set to 0 therefore, the car starts driving in a straight line. On frame 30 the skid was changed to -6, so between frame 16 and 30 the car turns on a slight angle. For the texture of the plane and the lights scene files were used. The plane was kept the same however, by using a skydome light allowed images that are through a fish ey

Maya Rigged Car

Image
After rigging it allows the car to move, rotate, scale and use skid to also rotate. By editing the expressions under rotate x for each wheel allows them to rotate while the car is moving.

Further Research into My Chosen City

Image
What is the culture of the society? As Isaura is a city based on dry terrain, means water has become really important to them; to the point where it is now a form of worship. This city may seem to be overrun with various techniques in drawing up water however, it could be due to the number of crops and plants being grown as it would be the only source of food and materials that they have access to. Therefore, these techniques of drawing up water (using wells) could be considered as a holy place, for example presented within temples and shrines. As I am looking into the religious side, I could link this to Shintoism. This is a Japanese religion that dates back to the early 8th century and it consists of the worship of ancestors and other nature spirits. They have a belief in a sacred power also known as 'kami' where they praise the existence of these gods/spirits. This is because they believe that kami are close to humans and have an influence on their lives as well as natur

Photoshop Master Studies

Image
Linlithgow Palace Gibside from the North Rotterdam Ferry Boat By doing these master studies it helps in getting a good idea of how perspective, colour theory and contrast affects the whole outcome. The aim of these master studies was to not focus too much on the smaller details but on how the colour is used, for example the foreground consists more of darker and contrasting colours compared to the background (this helps in emphasising the depth of the environments).

Perspective Exercises

Image
Two Point Perspective Three Point Perspective One Point Perspective

Animate Bouncing Ball

Image
Cartoon Bouncing Ball Vertical Drop For the first animation I created a ball that bounced in arcs and that also had cartoon like movements. It shows how the ball loses momentum as it moves along until it stops. Within the second animation I used 3 different sizes to present the different weights and due to this the movement differs, for example the bigger; much heavier ball falls faster than the others but does not bounce as much.

Online Greenlight Review

OGR by Saskia on Scribd

Maya Lesson Three

Image
During this time the main focus was learning to texture the model car. This consisted of grouping all of the pieces and making sure that the car is in the centre of the grid. To start texturing; a ground plane has to be created, which acts like a background when rendering. Alongside this I inserted a light to simulate sunlight that would create the shadows. (Figure 1) Figure 1 When rendering the Arnold render is used, when I pressed play it created the IPR render (Figure 2). I also made sure to scale up the plane so the edges did not show in the background. Once the render was stopped, I was then able to move onto adding colour onto the car. To do this I started with the main body so shift selected it all, I was then able to assign a new material. This was under the Arnold dropdown box and its shader is called Ai Standard Surface (Figure 3). It allowed me to use the attribute editor to assign the selected blocks with a material and to change its colour. Figure 2

Who's Who - Claire Keane

Below is a link to the Who's Who scribd document Who's Who - Claire Keane

King Kong (1933) Film Review

Image
King Kong can be linked to multiple genres such as adventure, horror and science fiction. It was directed and produced by Merian C. Cooper and Ernest B. Shoesack (Figure 1 IMDb, 2019) and was written by Ruth Rose and James Ashmore Creelman. It was fully released in the USA by the 7 th of April 1933 and then 10 days later released in the UK on the 17 th of April 1933. Figure 1 This is set during 1933, where a film director (Carl Denham) needs to go on an expedition to create his new film. His agent (Charles Weston) refuses to hire an actress for him as he considers the whole idea being too dangerous. Therefore, Carl goes out to find someone who would be suitable to play the role; which is where he comes across Ann Darrow. After talking he eventually convinces her to take the role and join him in the adventure. While travelling Ann meets Jack Driscoll who is the first mate and they are instantly attracted to each other. After weeks of travelling, they arrive at an is

Invisible Cities Thumbnails

Image
Baucis City Thumbnails

Animate Lesson Two

Image
Within this coin and pendulum task it presents the difference between the timing and spacing. The timing is the same however, spacing each circle differently creates a visual difference.   Coin and Pendulum Animation

Lego Car

Image

Metropolis Film Review

Image
Metropolis is a German science fiction film. It was directed by Fritz Lang and written by Thea von Harbou. It was released in Germany on the 10 th January 1927, then the restored version was first shown in the UK on the 17 th November 2001. (Figure 1 IMDb. 2019) Figure 1 Compared to the Cabinet of Dr Caligari, this silent film interested me more due to the dystopian story line. Plots that focus on dystopian worlds hidden by utopia is something that has always interested me. As is supports the fact that living a utopian life is impossible and there is always something negative somewhere even if it hides itself at the beginning. “Dystopian nightmare about a city-state built on slave labour” (Bradshaw,2019) This sums up the main plot of the film as society was split into two, the workers (hands) and the wealthy (head). Therefore, for this “nightmare” to end a mediator was needed to act as the heart to bring both of the sides together. This film is set in a cit

Invisible Cities Thumbnails

Image

Maya Lesson Two

Image
During this time I created different Lego shaped pieces, so I'd be able to create a Lego style car as a final outcome. To create the 1x1 block; I started with a cube (height 1.2 and all subdivisions 2.) Using the edge loop tool allowed me to curve the edges (as shown on image 1.) When creating the circle part for the top, I started by selecting the whole of the top face, then using the Extrude tool to offset it by 0.14 (as shown in image 2.) By selecting all of the vertexes on the inner square; I created the circle by using the Circularize tool under the Edit Mesh tab. When re-selecting the face of the circle I was able to Extrude it and then Bevel the edges to create the first block. (As shown in image 3.) To create the other blocks I used the Mirroring tool. First duplicating my current shape then selected the whole face of one side to delete it (as shown in image 4.) After changing the settings of the mirror tool, I was able to add to may existing block to create a new one (f

Drawing Skills

Image
Image One: Collaborating on Others Work Image Two: Exaggerating Lines Image Three: Negative Space Image Four: Focus on Depth Image Five: Focus on Tone

Animate Lesson One

On Friday was the first Animate lesson, the task was to show the transition between a self-portrait, to a piece of fruit, to an animal then back to the self-portrait again. When setting up I changed the width to 1920 pixels and the height to 1080 pixels, alongside the frame rate to 24. When creating this animation, I drew the three separate images first. Then working on the middle frame of two images before the individual transitions. When majority of the animation is completed; I then went back and reviewed it, so I was able to add any extra frames I thought were needed. My Animation Work (Google Drive Shared Link)

Photoshop Lesson One (Pre-Introduction)

Image
Yesterday was an introduction to Photoshop, as I’ve used this software before during my photography course, I already knew the basics. After we went into the best way of creating thumbnails, by using the templates provided we were given 20 minutes to complete all 16. As shown in the image (Octavia City) I was unable to complete all 16 however, within some of the thumbnails I quickly sketched out there are a few that I would want to develop more on. One idea being the rope bridges between buildings. After doing this exercise it has shown me that I do not need to spend hours on a few thumbnails, when I could just give myself 30 minutes to complete a whole sheet.

Maya Practice

Image
Throughout this week I have been practicing on moving around the objects I created, which is shown within these images. I also duplicated them to make more complex structures. By doing this it has helped me to get used to using the basic controls, for example moving around the work space (to view my work from different angles) alongside using the shortcuts.

Film Review One - The Cabinet of Dr Caligari

The Cabinet of Dr Caligari is a German horror/mystery film, it was directed by Robert Wiene. This film portrayed a hypnotist (Dr Caligari) who uses a somnambulist (a sleepwalker named Cesare) to commit murders. This storyline was written by Carl Mayer and Hans Janowitz and was released in Germany on the 27 th February 1920 and then four years later in the UK on the 31 st January 1924. Overall, I had no strong feeling about this film in general, I believe it’s because it was the first silent film I have seen. Therefore, I did find the storyline a little difficult to follow, which was due to multiple reasons. One the quality of the film made it difficult knowing the difference between all of the characters. This is because of the resolution as both their clothing and facial features were difficult to depict between each of the characters. Alongside this, I personally found that the narrative of the film got dragged out a bit, as it felt like the pace of the storyline in the

Maya Lesson One (Pre-Introduction)

Image
This first lesson of Maya was all about the basics. I focused on Extruding, Bevelling, Colour and the Pivot tool. I found doing these tasks difficult to begin with but as the lesson continued; I noticed a few similarities between Maya and Photoshop. I will continue practicing with these shapes for the rest of this week, which would help in making me more confident in using this type of software. To get the ‘L’ shape you need to use the Extruding tool. This is done by selecting the face of a cube (from one of the rectangular shapes) and then selecting the Extruding tool. This will create a cube inside the current shape therefore, by using the move tool you are able to pull out the new section of your current shape. (Image one shows the shapes I created including the ‘L’ shaped one.) As the main project I am focusing on is environments, it is really uncommon to find a building with sharp edges. Therefore, the Bevelling tool is used to slightly curve these edges. First